heroku,免費託管伺服器
終於走到了這一步,最後的最後就是將伺服器託管道雲端了!在這過程你用過了雲端資料庫、webpack、typescript和vue等等東西,最後就是將你的成果部屬到伺服器!並利用heroku已經整合好的自動化佈署讓你每次推完就立刻更新伺服器,開始註冊吧!
使用與註冊可以參考這個網站搭配 Git 在 Heroku 上部署網站的手把手教學
輸入基本資料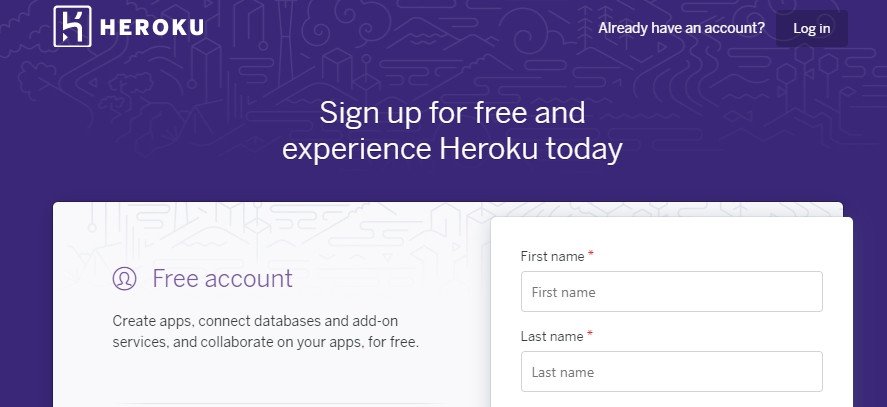
然後會寄出ㄧ封信,前往開啟連結後輸入密碼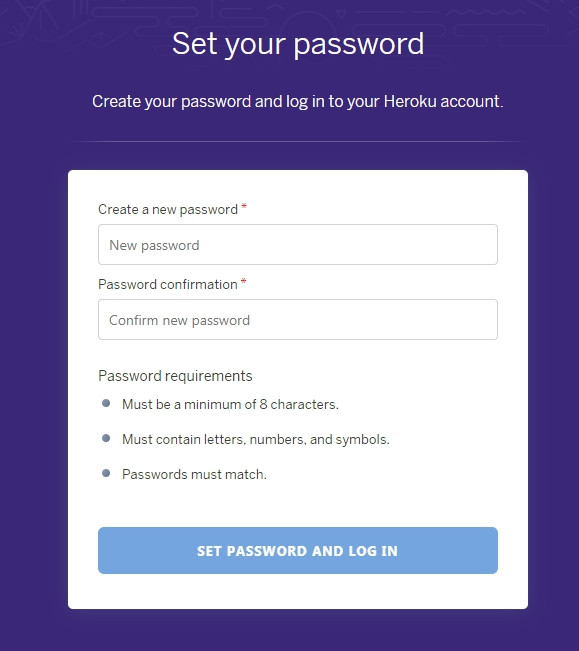
同意...你也沒辦法拒絕不是嗎?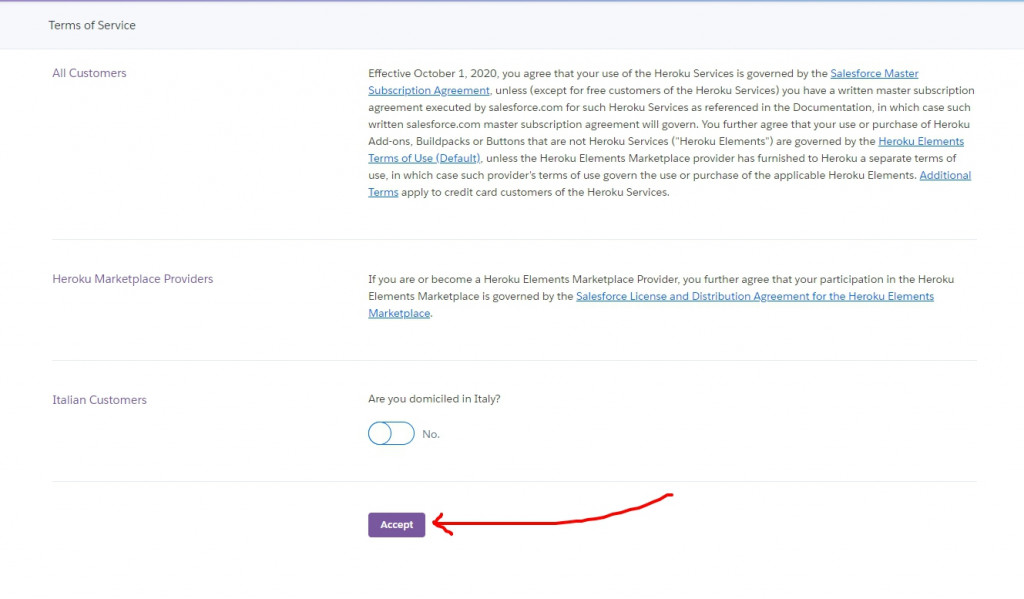
進入登入完成的畫面!
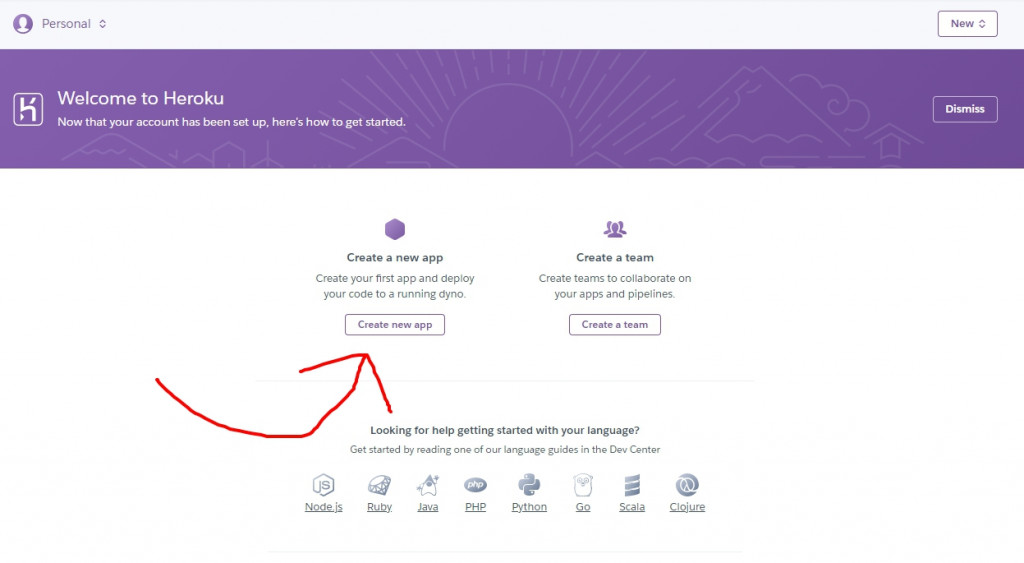
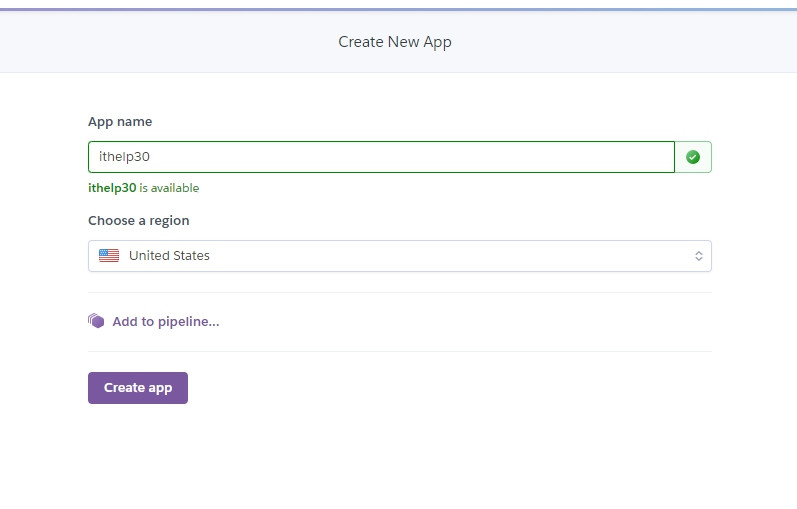
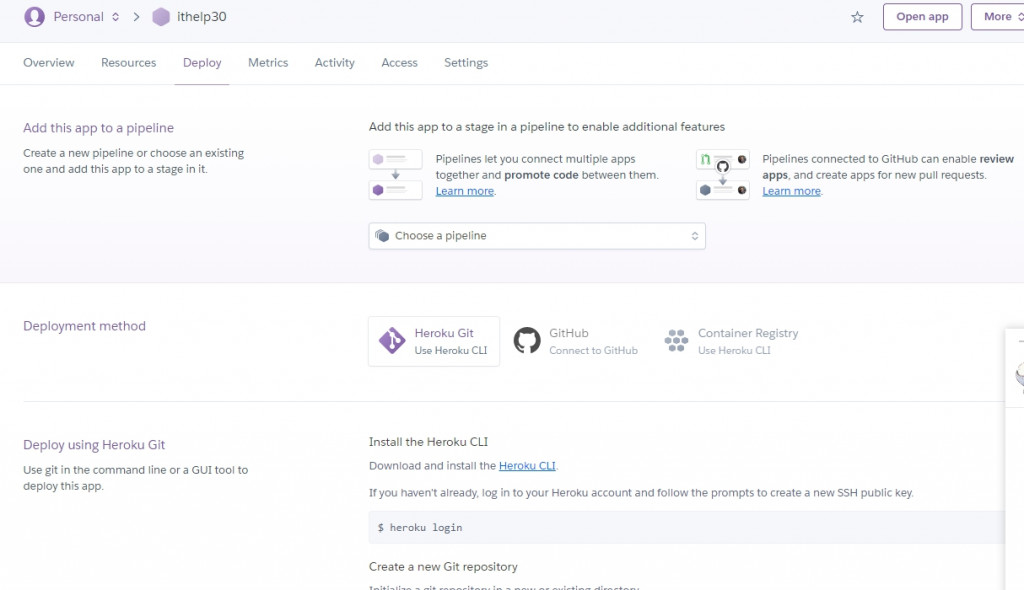
接著利用github自動佈署
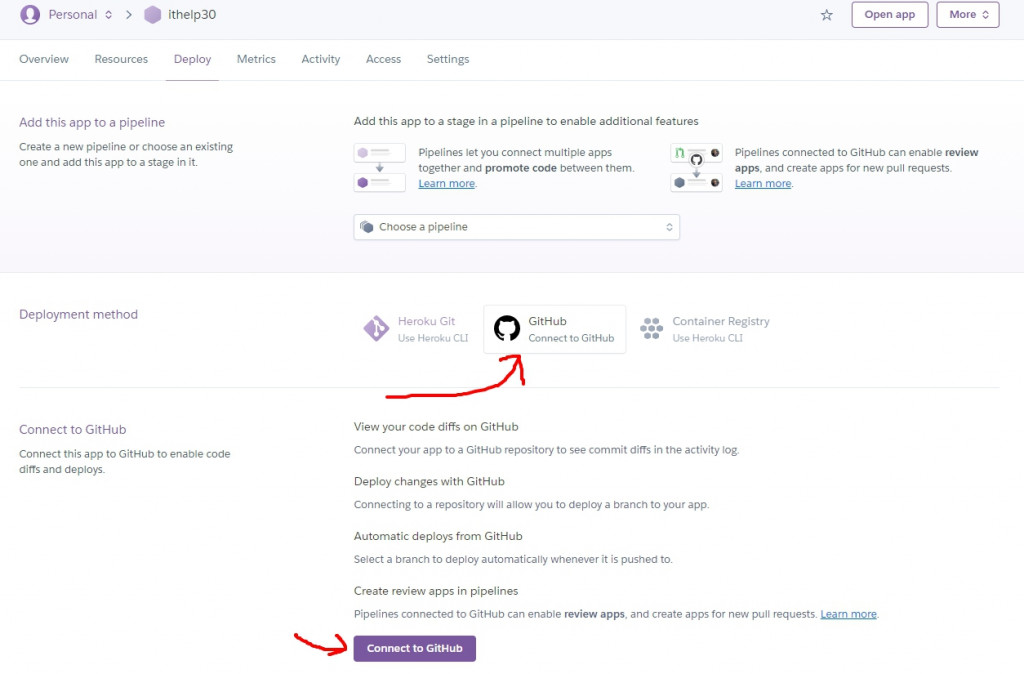
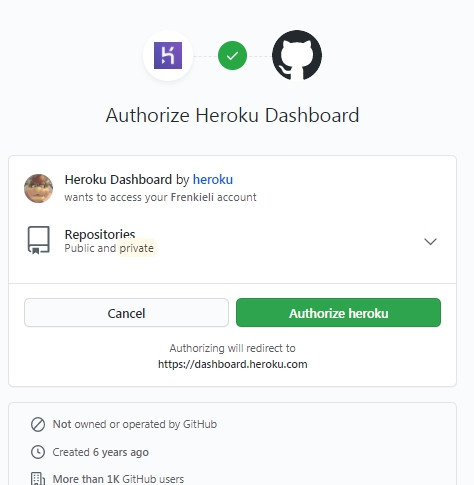
搜尋你建立的專案
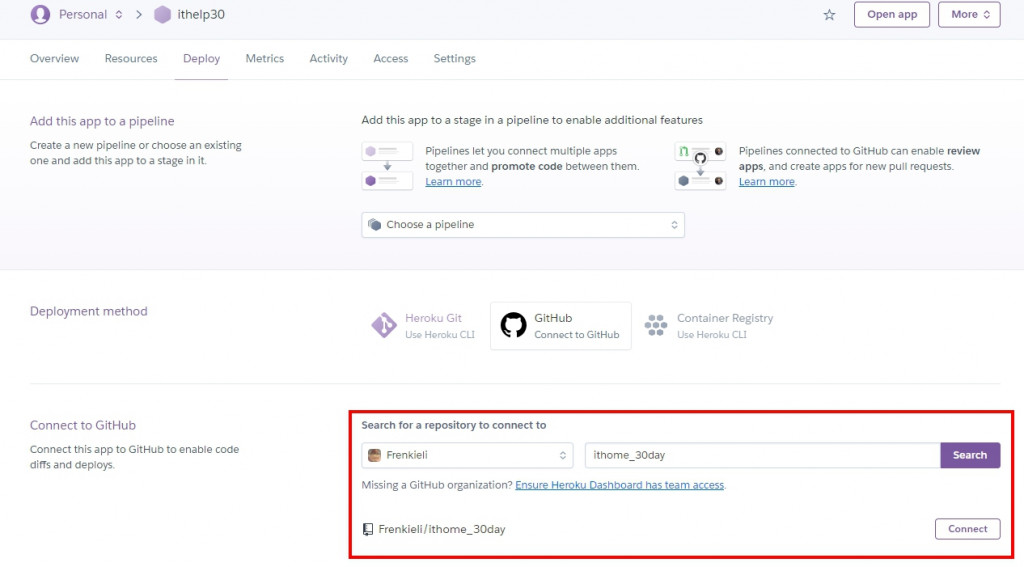
這樣就算完成了!
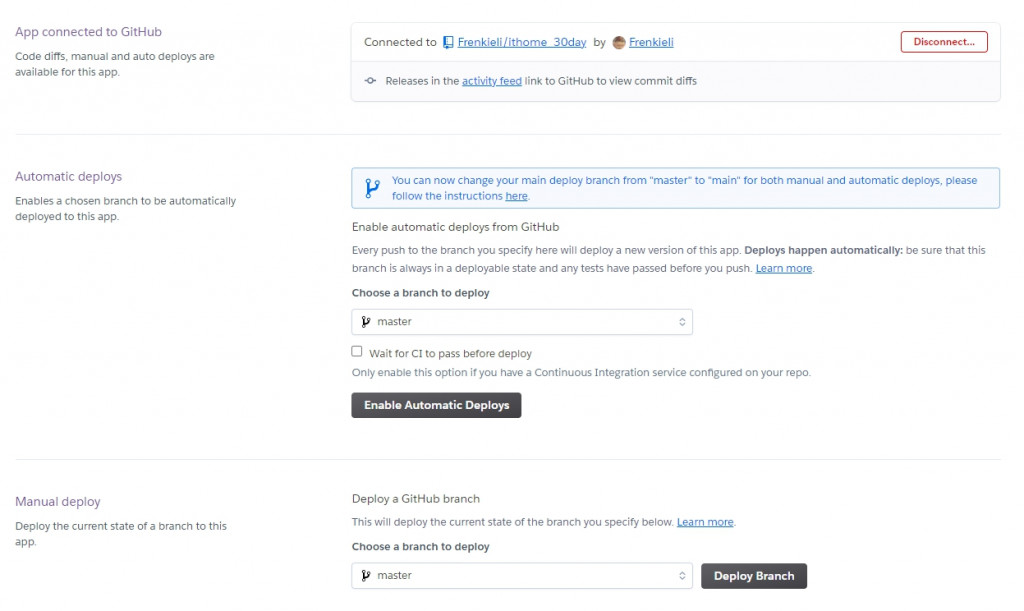
接著啟用自動佈署
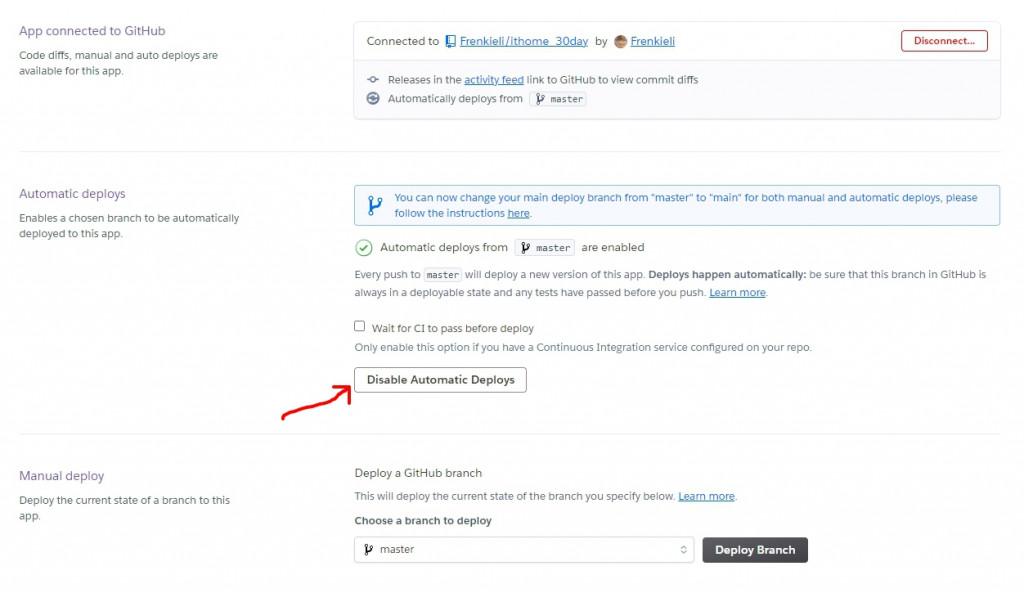
然後讓我們最後開啟VScode進行ㄧ些heroku用的設定!heroku的設定主要是在package上,當你啟用自動化部屬後專案推到github就會自動部屬到heroku!然後heroku會自動執行"npm start"這個命令腳本。但是這個專案直接執行"npm start"是會失敗的!必須先執行過weboack的編譯後才能使用,所以這邊追加給heroku專用的命令腳本"heroku-postbuild"並下"webpack -d"就可以了(webpack -d的意思是跑開發設定,細節過多不再討論範圍)
package.json
{
  "name": "ithome_30day",
  "version": "1.0.0",
  "description": "IT邦邦忙鐵人賽用git檔案",
  "main": "index.js",
  "scripts": {
    "start": "nodemon dist/index.bundle.js",
    "test": "echo \"Error: no test specified\" && exit 1",
    "webpack": "webpack -d -w",
    "heroku-postbuild": "webpack -d"
  },
  略
}
然後開啟Sourcetree進行"commit"後推上去就完成自動部屬了!
如果你跟我ㄧ樣試另開分支的話,那回到heroku點選該分支並手動部屬
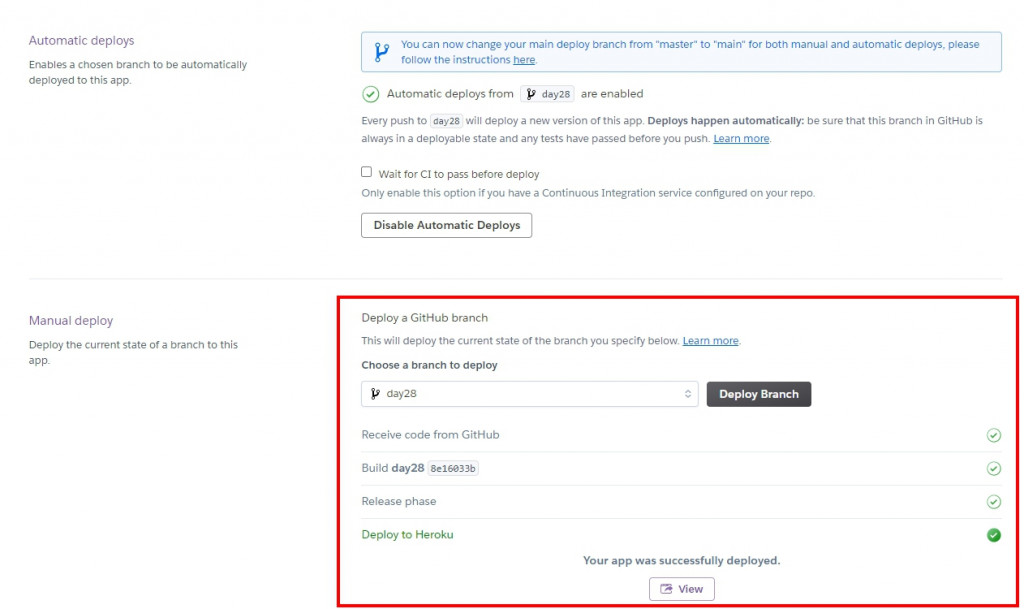
他會顯示部屬完成,你可以點開view直接開啟那個網頁!
然後你會發現他壞掉了...因為在"package.json"中"start"使用的指令是要用"nodemon"起動伺服器,但是"nodemon"在"package.json"內是開發中使用的套件。這樣會導致heroku不會將他引進你的環境下執行,所以這邊要進行修改
package.json
{
  "name": "ithome_30day",
  "version": "1.0.0",
  "description": "IT邦邦忙鐵人賽用git檔案",
  "main": "index.js",
  "scripts": {
    "start": "node dist/index.bundle.js",
    "test": "echo \"Error: no test specified\" && exit 1",
    "webpack": "webpack -d -w",
    "heroku-postbuild": "webpack -d"
  },
略
接著直接推到你的那個分支,heroku就會進行自動部屬了!
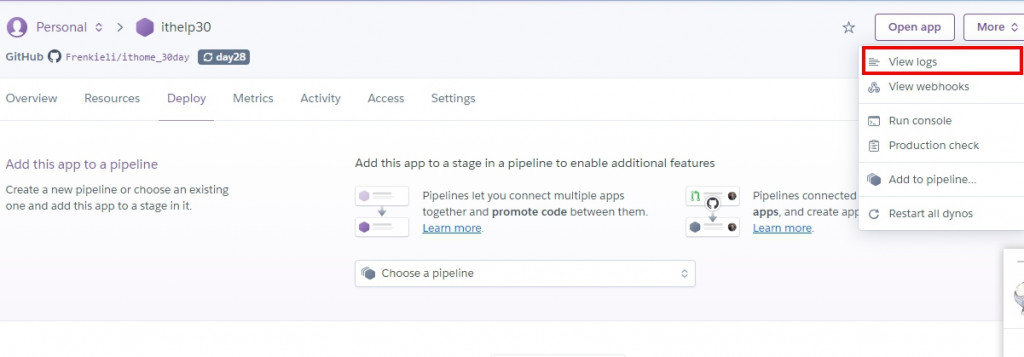
可以點開logs看看你的伺服器運行的狀態,或是點open app前往就可以看到你的網頁了!現在伺服器就正式部屬到雲端伺服器了!


![[day12][註冊][實作] 串接,雲端MongoDB Atlas資料庫(上)](https://blogger.googleusercontent.com/img/b/R29vZ2xl/AVvXsEgLwMKTRB6O6vB2T6YZ5Noa6u6PG-kK7MD7TZozfGVj3qVPcduL4cRyMXWczOu1-dgUeqPcXW8vmGZVwEetPOW3jYfU0OznZ7rKHCarCL0A3Aate9_xpZK8mspraQl181QI7qrXVJcU9iN7/w100/pexels-pixabay-270632.jpg)
![[day15][全端][學習] EJS,長的跟HTML87%像的樣版語言](https://blogger.googleusercontent.com/img/b/R29vZ2xl/AVvXsEiAdPt8gokd9p1VAFqMl9vCsEDq1HhbMQkQBhS3SFZhD3vHisl271X-JKvjNe_K8neG7OiCqkuTJ4kcYUN610wIBlUIQasjHhgclQwlu2U8tzYDIw87HJXlvyTJH2Pqej6rk_8Q0DdRyF9o/w100/pexels-pixabay-248515.jpg)
![[day13][後端][學習] 串接,雲端MongoDB Atlas資料庫(下)](https://blogger.googleusercontent.com/img/b/R29vZ2xl/AVvXsEjHPh-qsFa_3ytSZGfF_d50HN6msX2T-u9GoR_2Dnx5qg99tM1b5Bb6lbChghpOMrULccwyfvHxH5nteOP3Fo091vjhSQhY0F0ychqnaRTJGVuHrvYDHo3QVDHZxqRXujyEeWQwxFFtqjQi/w100/pexels-rodrigo-santos-3888151.jpg)
![[day16][前端][學習] 試著套用BS模板,讓你的網站一臉就是bootstrap](https://blogger.googleusercontent.com/img/b/R29vZ2xl/AVvXsEjO-BauH-334iBdWqmlRUzoaeWILjXMn6DgK4CJ8rzqjWSijRBy7d3kHwFMhkxoNVzNeKGEPbsb6SY1OiFBYAf-6HsrAjpENujLOi18apQe7HaW6kPyEULDPJy3BoM_2qd14DsYhhoWFwf8/w100/pexels-negative-space-169573.jpg)
![[day10][註冊][實作] 沒朋友就用LineBot機器人做一個(上)](https://blogger.googleusercontent.com/img/b/R29vZ2xl/AVvXsEjU__hLZ7pNUNJAzQgmVUJBXSC0HuUlwP4SsbrFdETfcbHTOmy2m59us1vp8uurIQnu9Mt5PljTBZBHTnqAAm-bgCWy1XyTH7cop36CyR1aulnZ2yEwtdof2QyWtbhVMHSfzQOaGkjZKfwL/w100/pexels-pixabay-270373.jpg)
0 留言